
Making a Transfer Drawing
How to Create and Use a Transfer Sheet in Paper Sculpture
This is a very important post for working in paper sculpture, because it details the thought process that allows you to take your flat initial drawing and think about it in terms of shape and dimensionality.
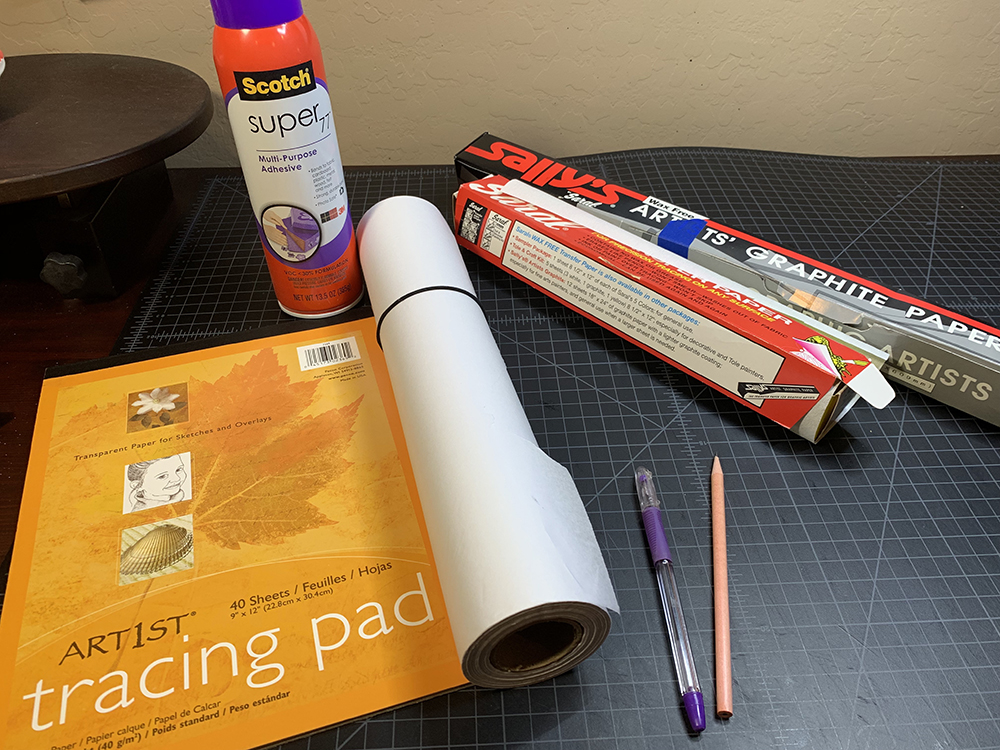
Supplies needed to work through this process:
Tracing paper.
You can buy this in pads or rolls (for larger areas). I can’t seem to find a really good transparent tracing paper anymore. These two are fine but are more opaque than I’d like.
Graphite transfer paper (optional)
An HB pencil
A colored ball-point pen
To start, print your initial drawing at 100 % of the final size. In this case, I printed it at several sizes. My original plan was to have final art be 8 X 10. However, when I printed it this size, I felt like it was generating too big areas of paper. (I'm beginning to appreciate the wisdom of working smaller). I settled on about 75% of that size. I didn’t want to go too small, because I want these images to look like a page in a picture book.
Step One: Decide Size of Final Art and Print at 100%
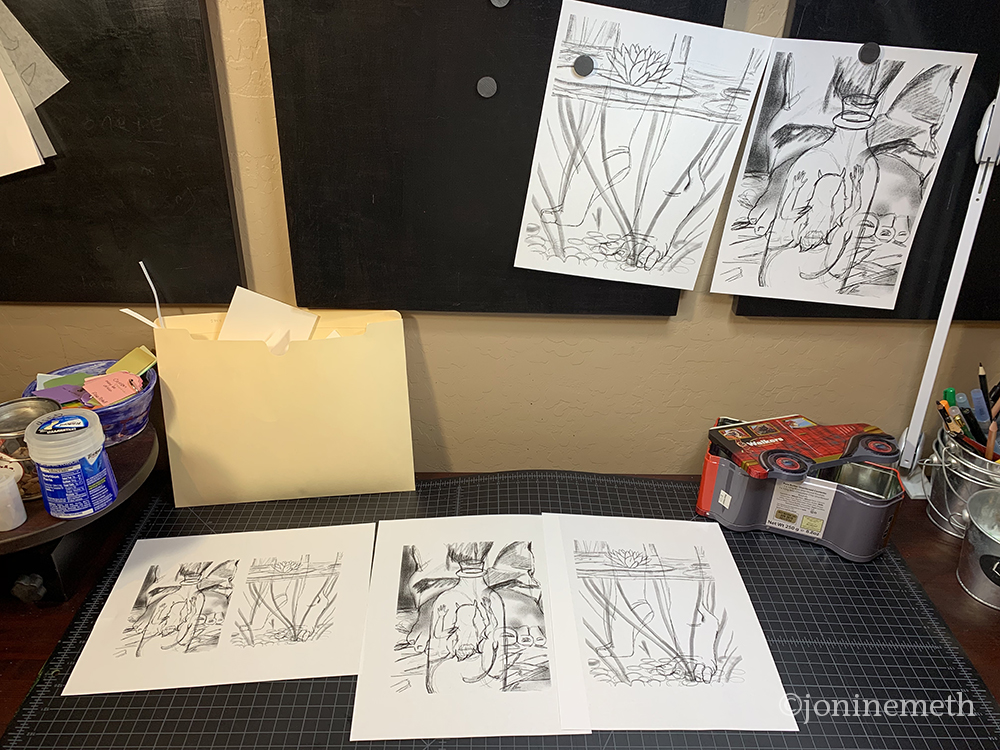
STEP TWO: Transfer major shapes and important lines from the drawing onto the tracing paper.
I created some videos for this section, and I talk and give a lot of good information in them.
I will try to hit the highlights here for those who don’t want to sit and watch the videos – I get it!
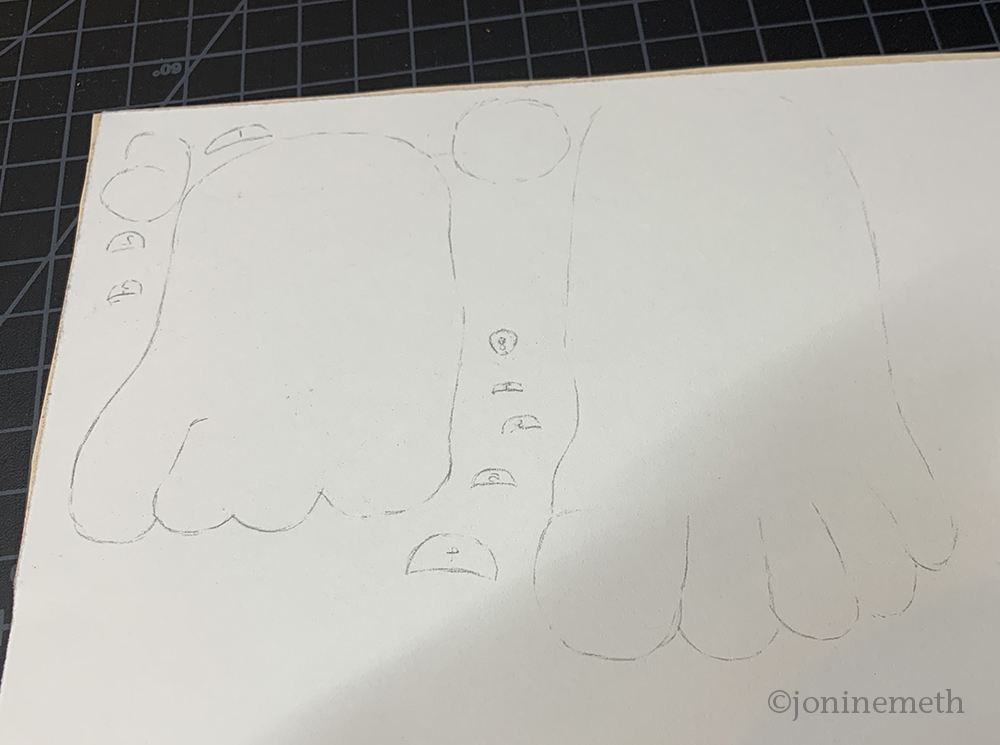
Trace the main shapes in your drawing/composition using a soft (HB+) pencil. As you draw, think of think of large shapes first, then the smaller shapes you will bring forward. You add “lines” in your image by cutting out various shapes, and also by where you make cuts or embossing. You want to indicate fold lines or major landmarks on the tracing paper also. Make sure you make a dark solid line with the pencil.
Sometimes it’s helpful to indicate color of the shape, or numbers. (When working with feathers on a bird’s wing, I number as I go, because I won’t remember down the road).
Video notes:
Long story (with lots left out!) – I captioned the first video and then learned that you can turn on captions in Youtube (!). If you can’t understand what I’m saying or like to watch with the sound off (I get it) you can turn on the Youtube captions.
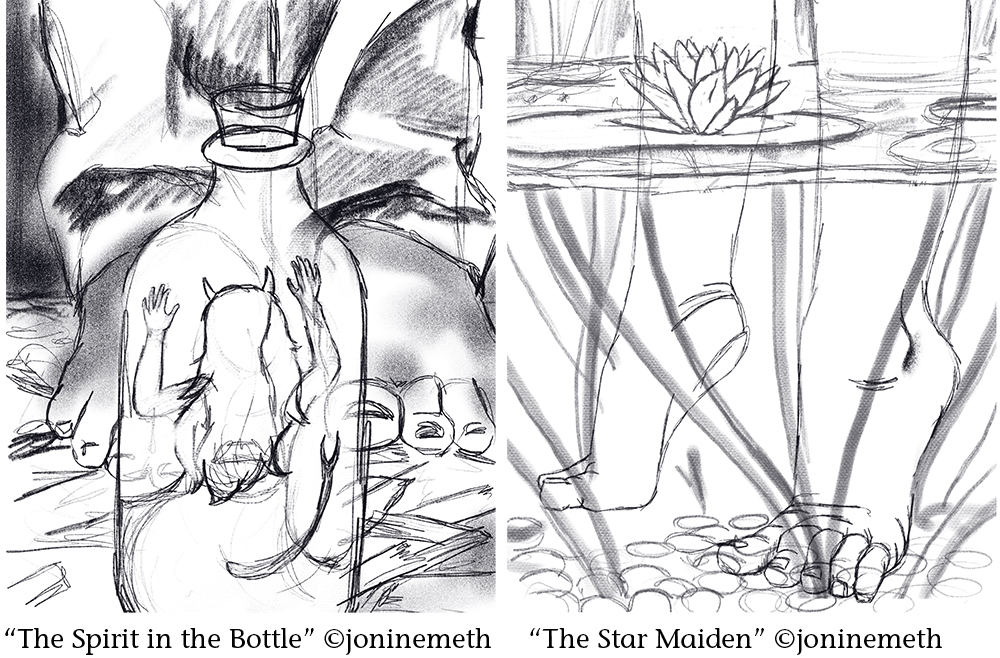
Video One: "The Star Maiden"
How to Transfer Your Drawing for Paper Sculpture (pt. 1)
Using the Example of "The Star Maiden" image, I describe how to think of your drawing in terms of shapes to create a transfer sheet (later to be used on colored paper samples).
Video Two: "The Spirit in the Bottle"
How to Transfer Your Drawing for Paper Sculpture (pt. 2)
Using the Example of "The Spirit in the Bottle" image, I describe how to think of your drawing in terms of shapes to create a transfer sheet (later to be used on colored paper samples).
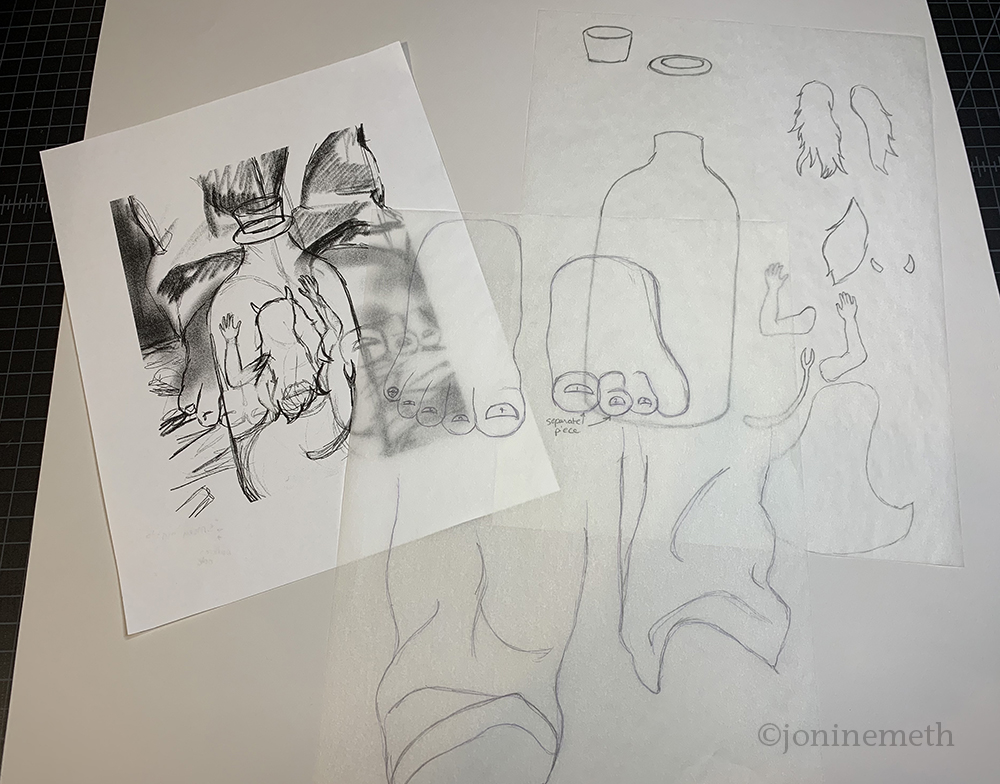
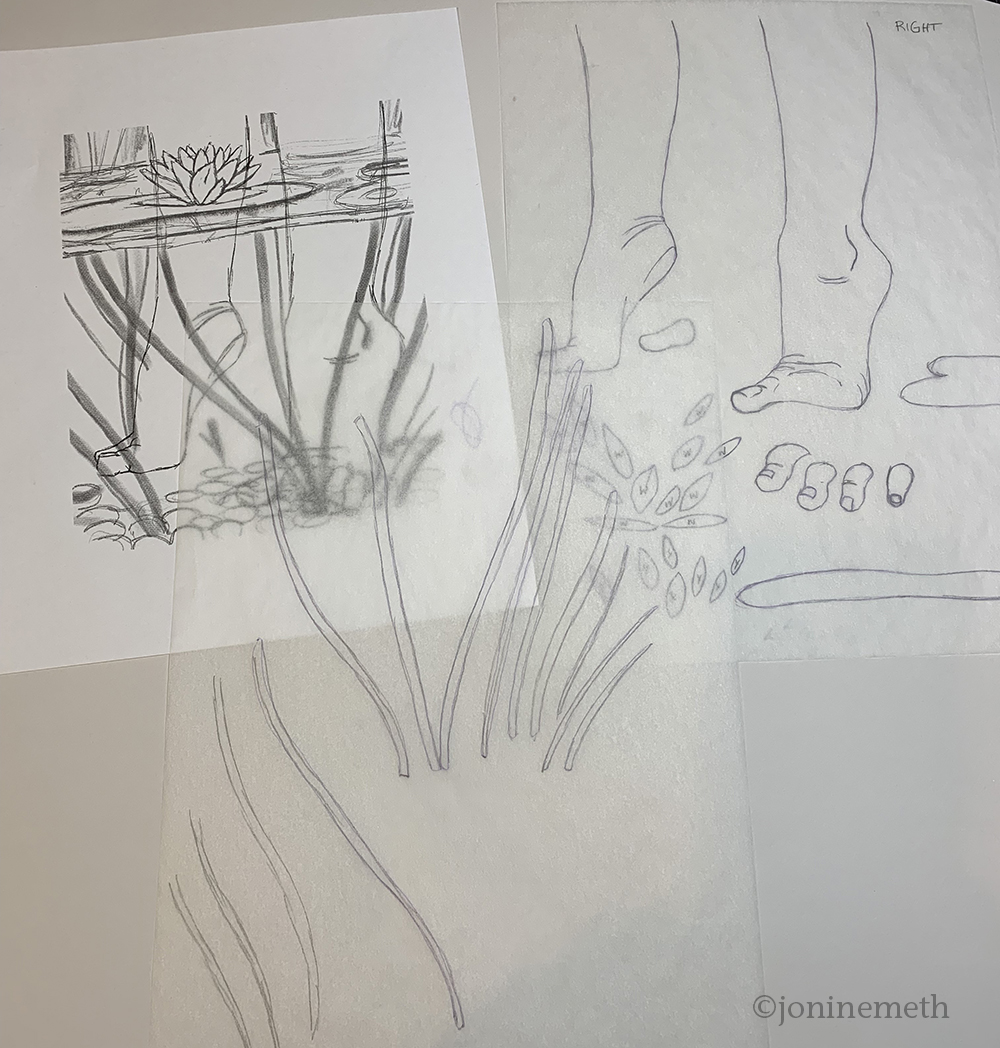
Final transfer sheets for both images:
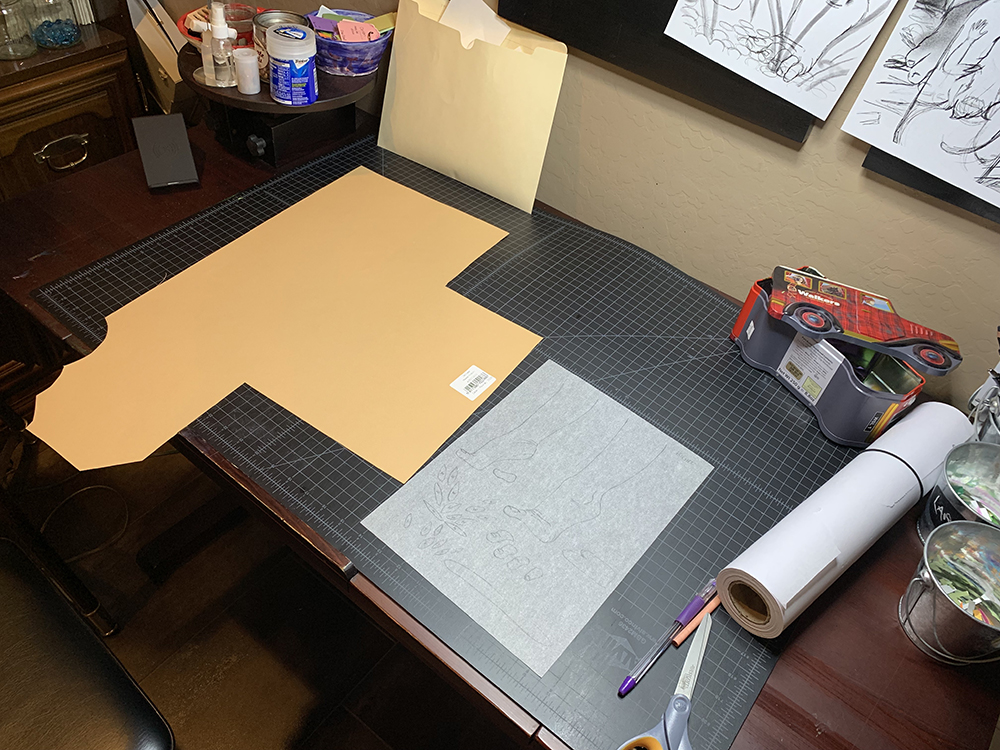
STEP THREE: Using the Transfer sheet on light colored papers.
If the paper is light enough it’s very easy to transfer your shapes to the appropriate colored papers. You simply turn it over. You want to make your cuts later on the wrong side of the paper so you transfer your drawing mirrored on to the paper. (Not sure I made this clear enough in the videos). The graphite lines are already on the paper, so you don’t need to use a graphite transfer sheet in most cases. I trace over the lines with a colored ball point pen – this is my preference because it helps me see where I’ve been and it leaves a nice line. I then just check over my transferred image and darken the lines if necessary.
I place the pieces close together to save on paper. I don’t worry about the grain of the paper, unless it was a patterned paper. Sometimes, you do have to watch for embossing on the paper (Mi-Tientes in particular).
Video Three: “The Star Maiden: Light Paper”
How to Transfer Your Drawing for Paper Sculpture (pt. 3)
Using colored papers selected for "The Star Maiden" image, I describe how to take the transfer sheet created in Pt. 1 of this video series and trace it down to outline the shapes by color of paper. This video focuses on using light colored papers.
STEP FOUR: Using the Transfer sheet on dark colored papers.
The process is very similar, except you will insert a sheet of white transfer paper between the transfer drawing and the colored paper. DON’T FORGET TO TURN THE TRANSFER DRAWING TO THE REVERSE SIDE. You always want to draw the mirrored shapes on the colored paper. You will probably have to check your drawing after each shape to make sure you haven’t overlapped images, as the white transfer paper is very opaque and you can’t see what you’re drawing underneath.
Video Four: “The Star Maiden: Dark Paper”
How to Transfer Your Drawing for Paper Sculpture (pt. 4)
Using colored papers selected for "The Star Maiden" image, I describe how to take the transfer sheet created in Pt. 1 of this video series and trace it down to outline the shapes by color of paper. This video focuses on using dark colored papers.
STEP FIVE: Cutting loosely the shapes and gluing into two-ply pieces.
Cut around the area of the shapes you’ve drawn, rather than individual shapes at this stage.
Self-Care Tip: I cut around the whole area of shapes, rather than individual shapes. This saves my hand cutting, and also makes it easier where I’m not trying to line up two shapes.
You then spray glue the cut shapes (on the NOT drawn side!), and then rub down on the wrong side of the remnant paper of the same color. You can sometimes use white as the backing. NOTE: if you are backing with another color, make sure your initial transfer is on the OTHER color (when you flip the two ply pieces over, you want the correct color of the shape to be on top). Seems obvious, but I’ve muffed this up many, MANY times.
The feet of the boy in “The Spirit in the Bottle” were transferred on white paper with colored paper on the other side (mainly because I already had this piece of paper to use).
Video Five: “Gluing the Shapes Down”
How to Transfer Your Drawing for Paper Sculpture (pt. 5)
Using colored papers selected for "The Star Maiden" image, I describe how to take the traced shapes and glue them to another piece of the same colored paper to make 2-ply sheets.