
Tools & Techniques for Embossing:
In shaping and embossing cut areas for paper sculpture, you always want to move from large areas to fine detail, and work from the inside out.
Tools for embossing:
This is not an exhaustive list, as some of the fun of this process comes from exploring different tools to see what you can achieve – I have even seen paper sculptors who use the back of a spoon to shape the piece.
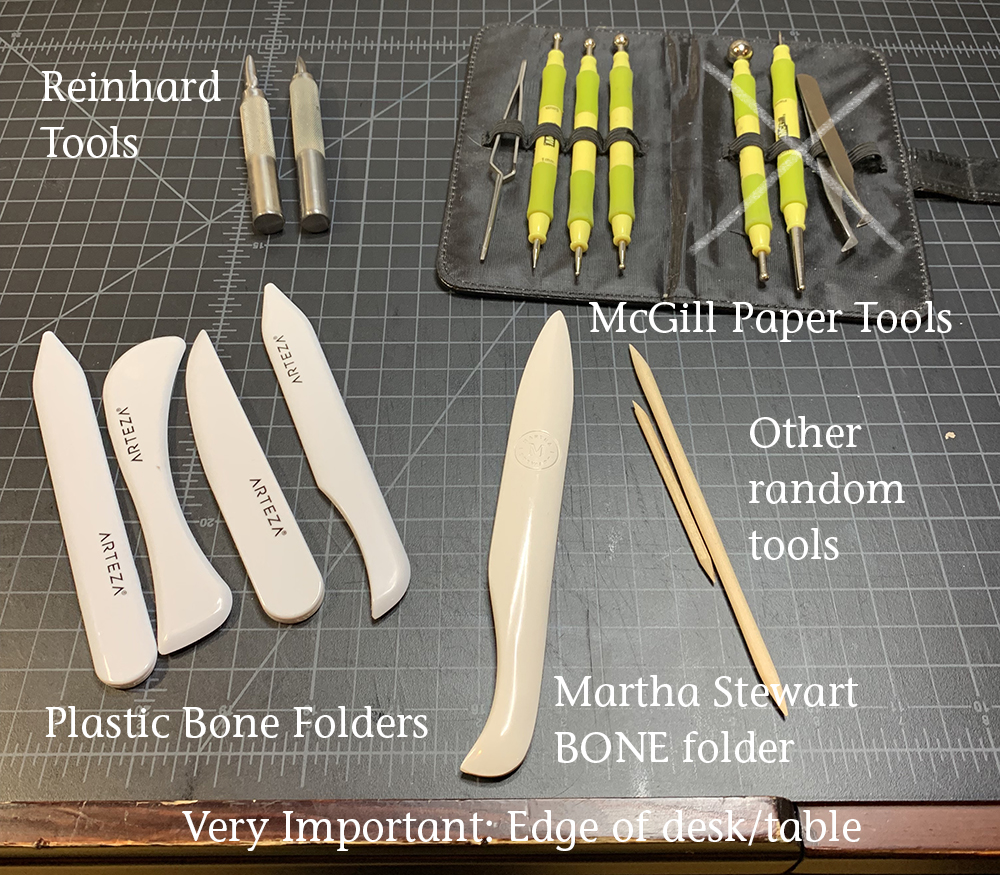
The McGill Paper tools with the rounded ball ends are very handy, and it’s nice to have a variety of sizes for differently-sized areas. You can also find similar shaped tools under “dot painting” and clay tools. The tools on the left side of the McGill Paper tools can still be purchased. They seem to have discontinued the ones on the right (I checked the manufacturer’s website) which is too bad because I use these tools a lot.
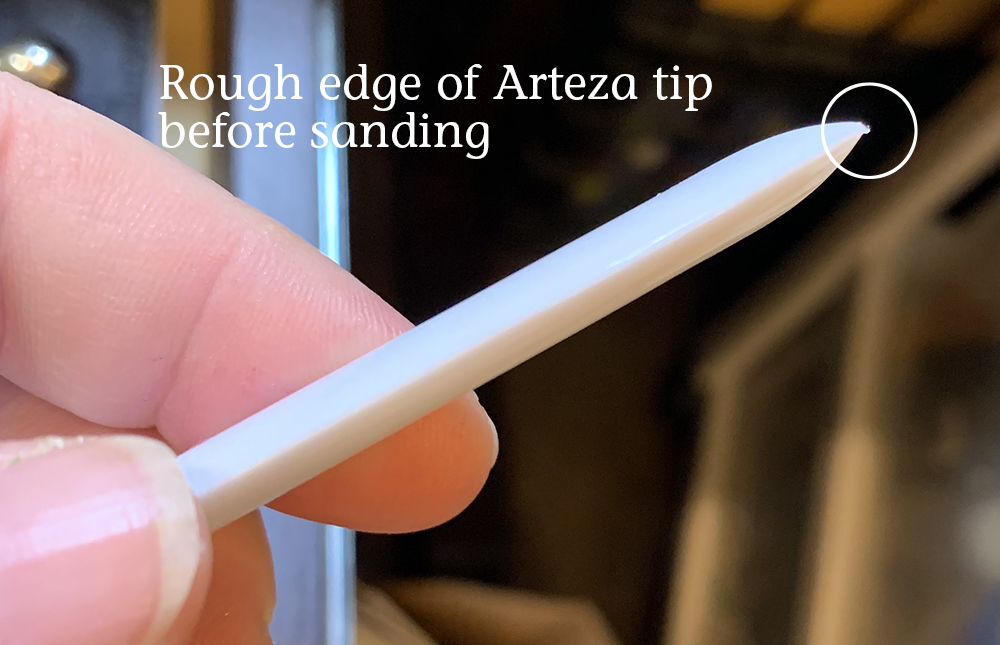
The Arteza plastic bone folders are not a bad option, and they are inexpensive. However, they are a little rough. I went through and sanded all the rough edges first, because you don’t want it scratching the paper.
Martha Stewart bone folder. I recently had to replace my 15-yo MS bone folder when I snapped the tip (using it to pry open a lid – my bad). This is NOT the same bone folder – it no longer tapers to a fine tip – and I’m fairly disappointed in this.
I also have some unusual tools that you won’t be able to purchase, and those are the paper shapers modeled after those designed by Reinhard. They are just a tool, however, and can be approximated in other ways.
The edge of your desk is also an important shaping tool, as are your fingers and even your fingernails (more will be discussed on these below).
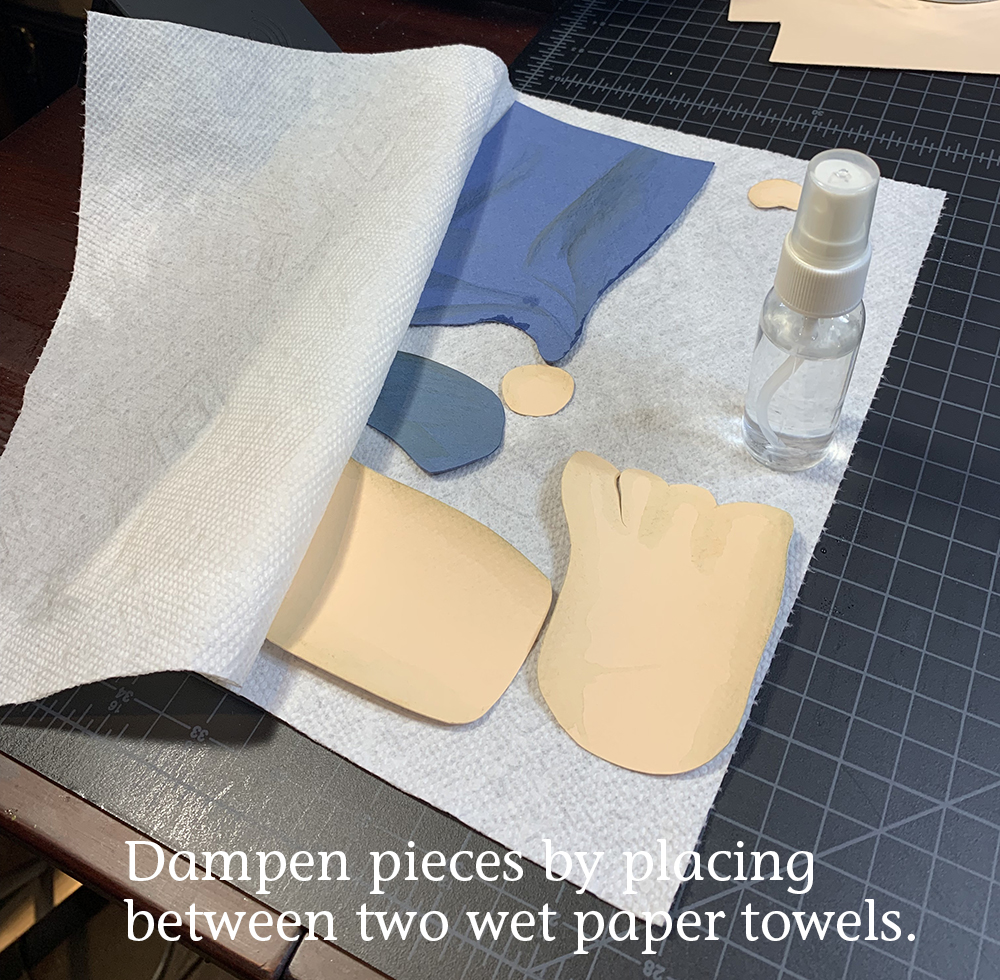
Wetting the Paper:
This was one piece of advice that was invaluable in my meeting with Reinhard. I had wondered if the paper needed to be wet to be embossed, and how wet to make it. (I would have made it too wet). Reinhard said to spray wet (not soaking) two pieces of paper towel, and then put the pieces of cut paper between the paper towels. It doesn’t take long – even just five minutes depending on the stiffness/thickness of the paper.
If the paper is too wet, you will know because the tools with skitter/bend across the embossed areas.
NOTE: If you live in a humid area, you may not even need to dampen the paper.
I live in the desert, so my paper is completely dry. I was recently at a workshop, however, where the paper was naturally damp enough that I could have shaped it as is.
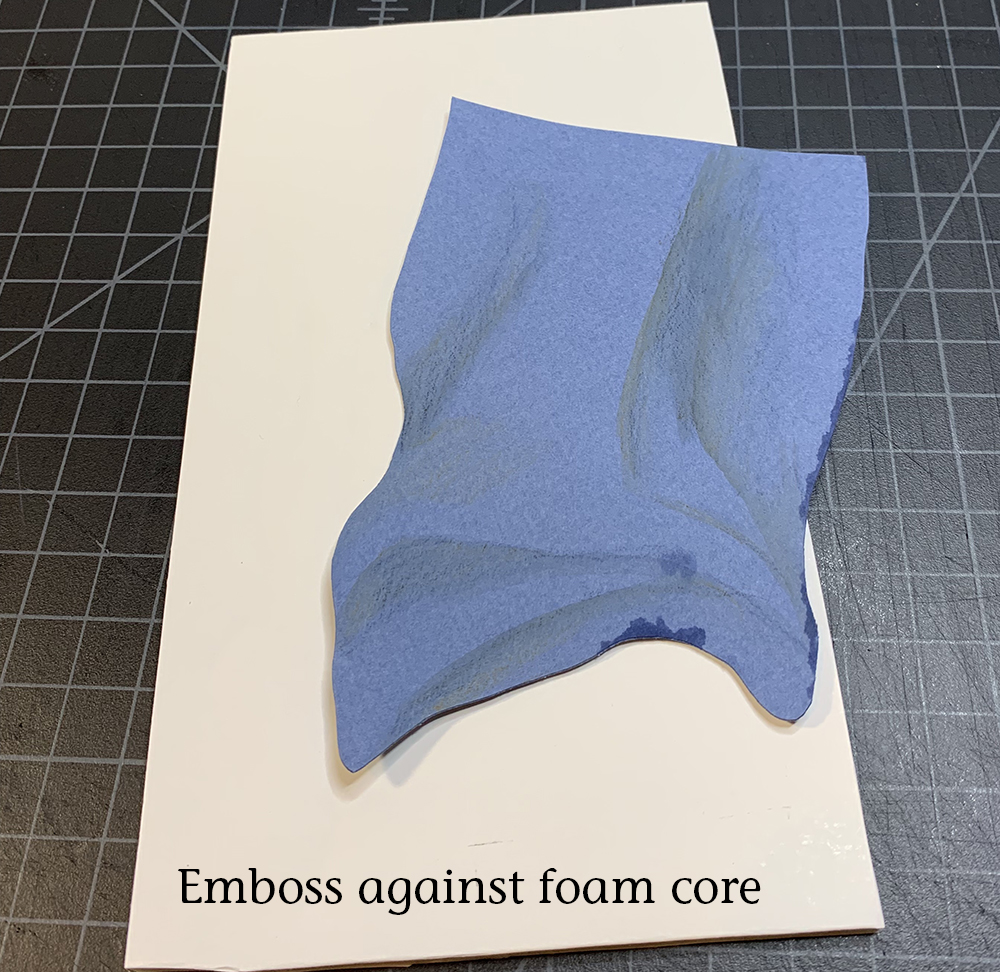
Embossing Surface (what you work the paper against)
Do NOT use the one they sell for the McGill Tools (and comes with some sets) – it’s too soft.
Reinhard suggested using a piece of foam core. We actually conducted several experiments together with various surfaces to emboss against, and the foam core was the best. Fortunately, because I use foam core to back my pieces, and they vary in size, I always have random bits of foam core around. It will break down as you emboss against it, and then can be cut up to add support to the final sculpture (detailed in later post).
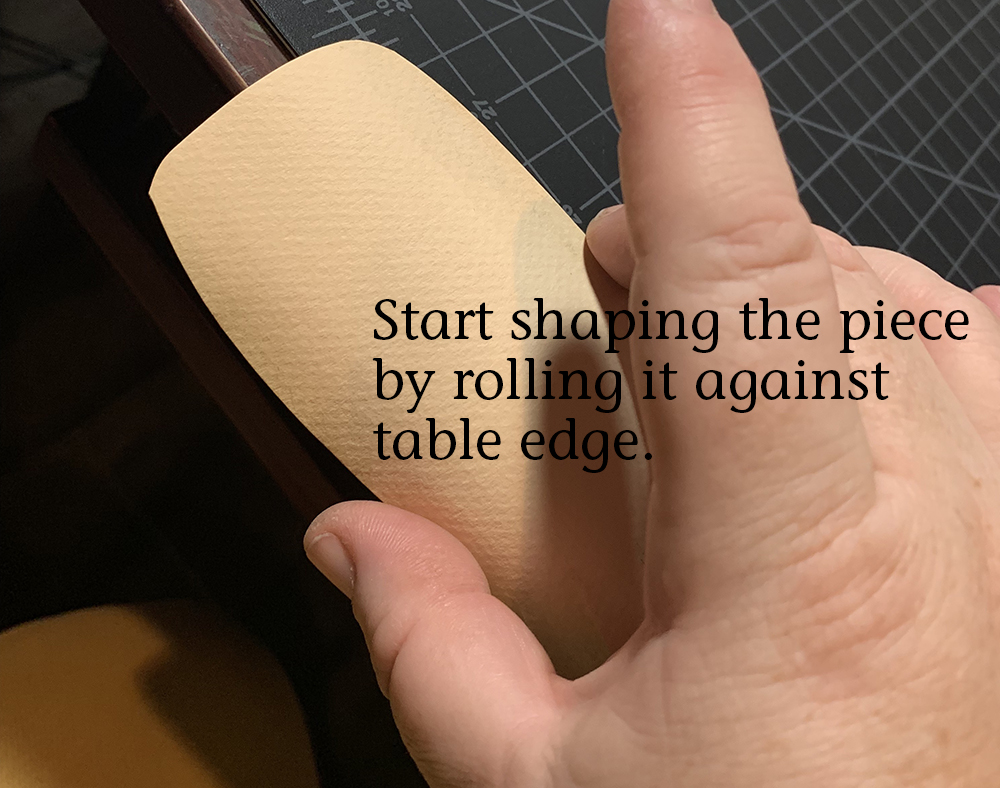
Shaping the Paper in Large areas.
I almost always start any shape by rolling it across the edge of my desk. This helps create the basic shape of the piece (and probably loosens the paper fibers somewhat). I don’t do this for pieces smaller than a couple of inches though.
You can also go into smaller areas to generate raised/lowered areas with a combination of rolling across the edge and forming with your fingers. (this is demonstrated in the video below)
VIDEO ONE: Embossing Large Areas - "The Spirit in the Bottle"
Bas-Relief Paper Sculpture: Tools and Techniques for Embossing (Part 1)
I demonstrate how to shape and emboss cut paper sections to form paper sculpture. This is based on large folds for "The Spirit in the Bottle" sculpture.
Shaping Smaller Areas of the Paper.
In smaller areas of the paper, you want to emboss using a variety of tools appropriate to the area. You generally start on the back or wrong side, working the inner areas. I am constantly turning the paper over, embossing on both sides to emphasize the up/down areas. (Similar to "répousée" in metal bas-relief).
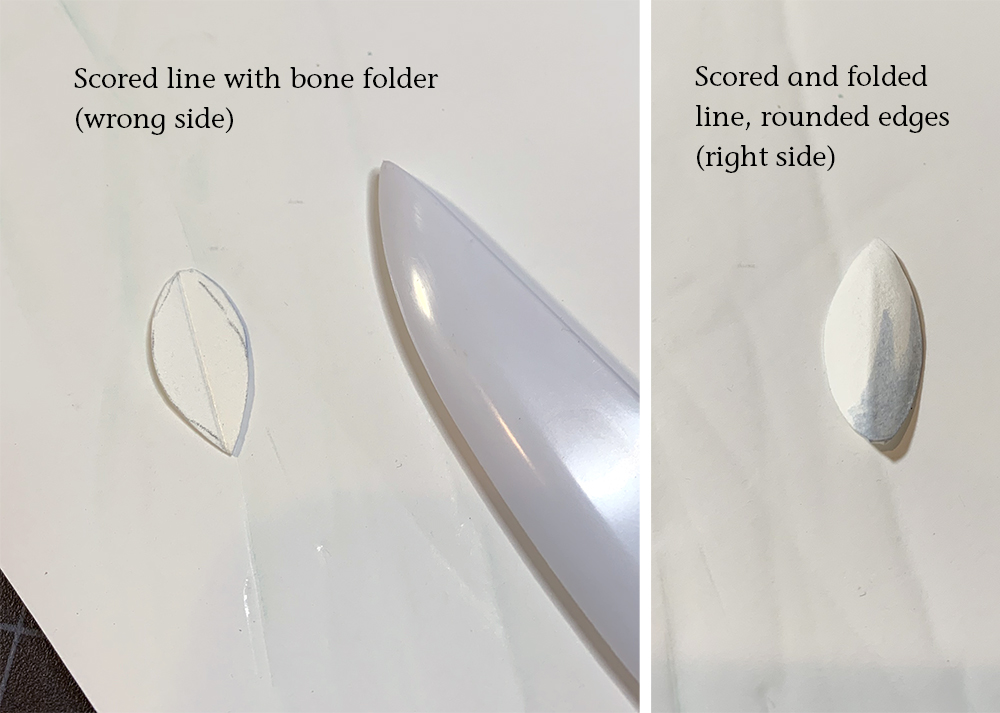
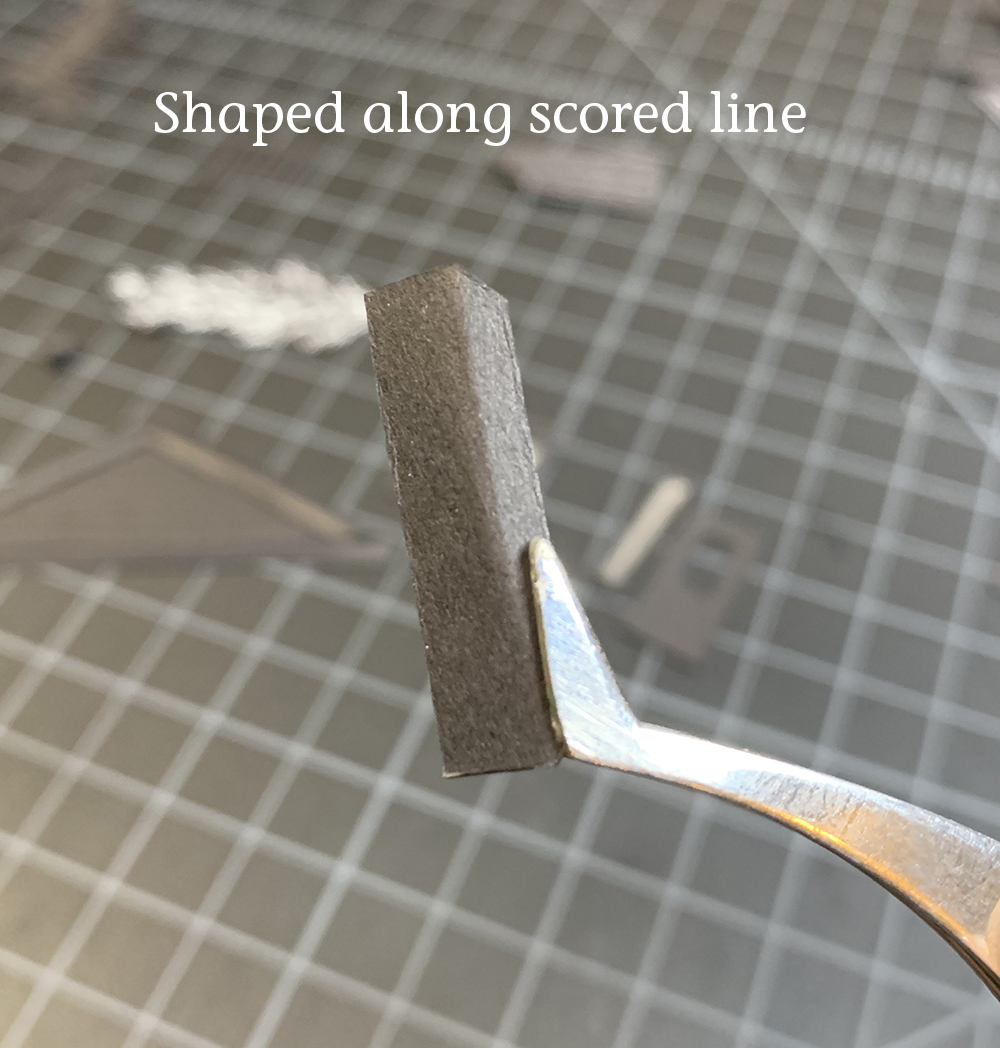
I will try to emboss smoothly for detailed areas. However, sometimes you want a deliberate line, which you will “score” on to the front or back using the fine edge of a bone folder or a small embossing tool.
You can create architectural shapes, or sharper visual dimensions
When the inner details have been added, I will go along the edge of the paper and curve it down. (Personal preference)
Note: There is a limit to how far the paper can be embossed. There was a max depth on the ankle bone in the video below that can be achieved. I think that is why noses are particularly hard in paper-sculpture portraiture, and front-on noses almost impossible. (This could be a post in itself).
VIDEO TWO: Embossing Smaller Areas - "The Star Maiden"
Bas-Relief Paper Sculpture: Tools and Techniques for Embossing (Part 2)
I demonstrate how to shape and emboss cut paper sections to form paper sculpture. I work on smaller lines and folds on the legs and feet from "The Star Maiden".
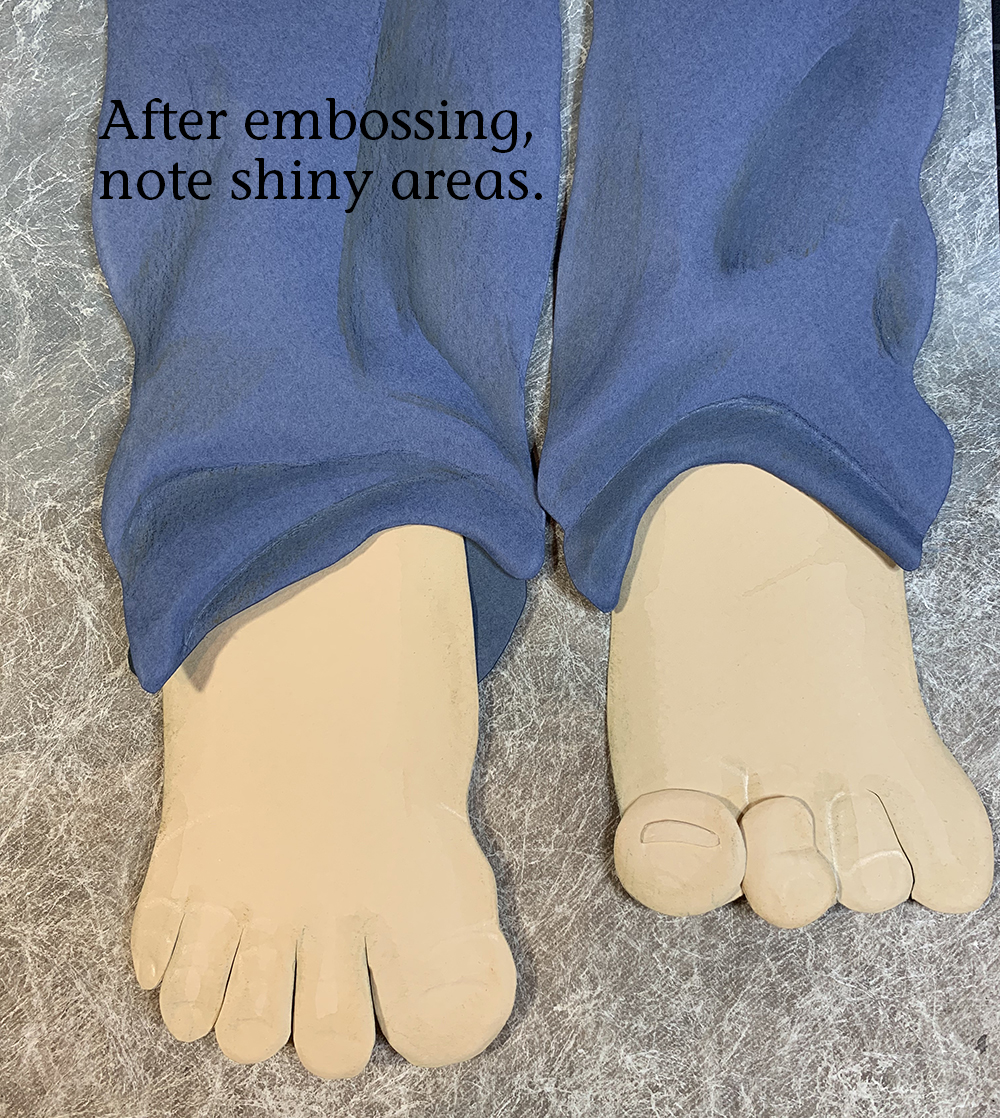
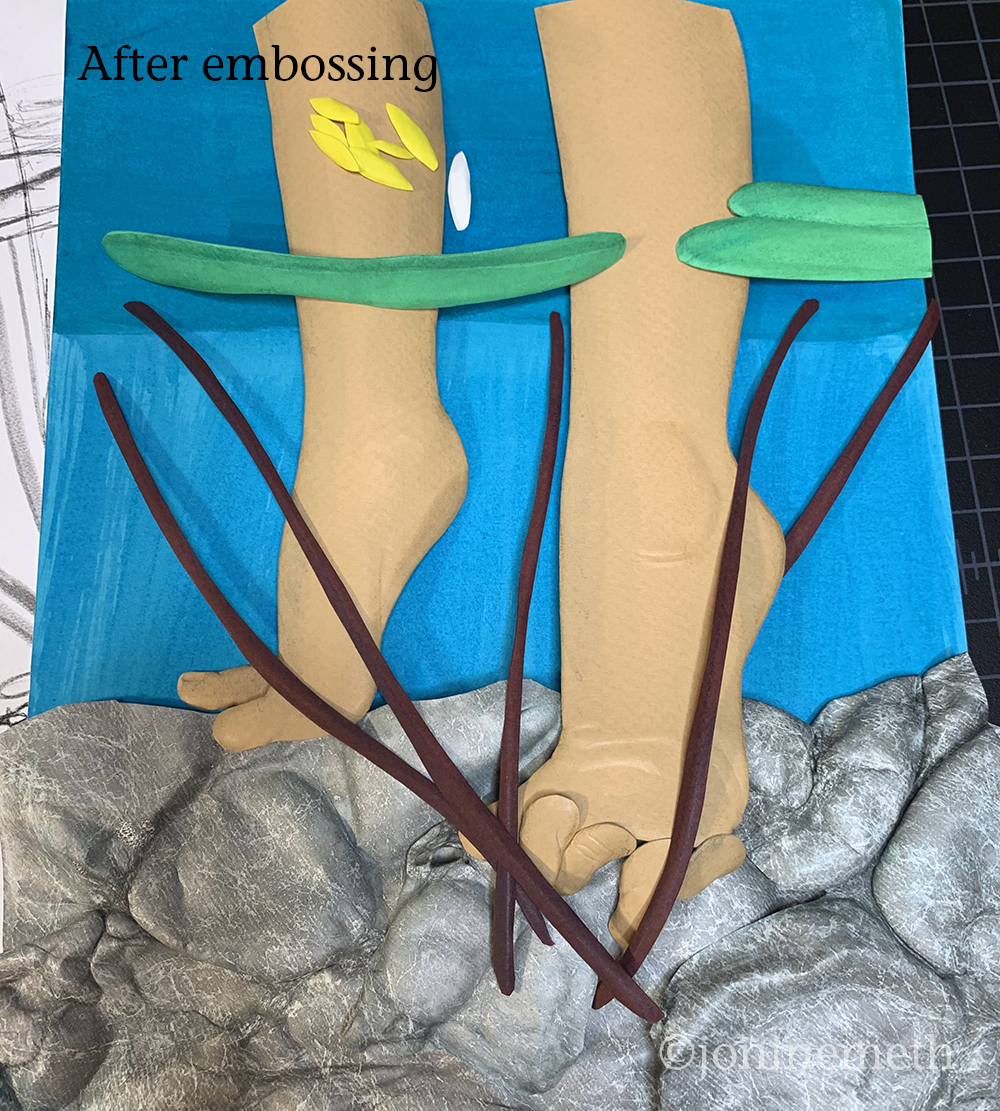
Note the shiny areas after embossing - there is a post on dealing with this.