
GLUE! and Cleaning Up Glue in Paper Sculpture.
A discussion of the glue recommended by Reinhard for use in paper sculpture, and how to clean up the inevitable glue overages to have a clean, finished-looking paper sculpture.
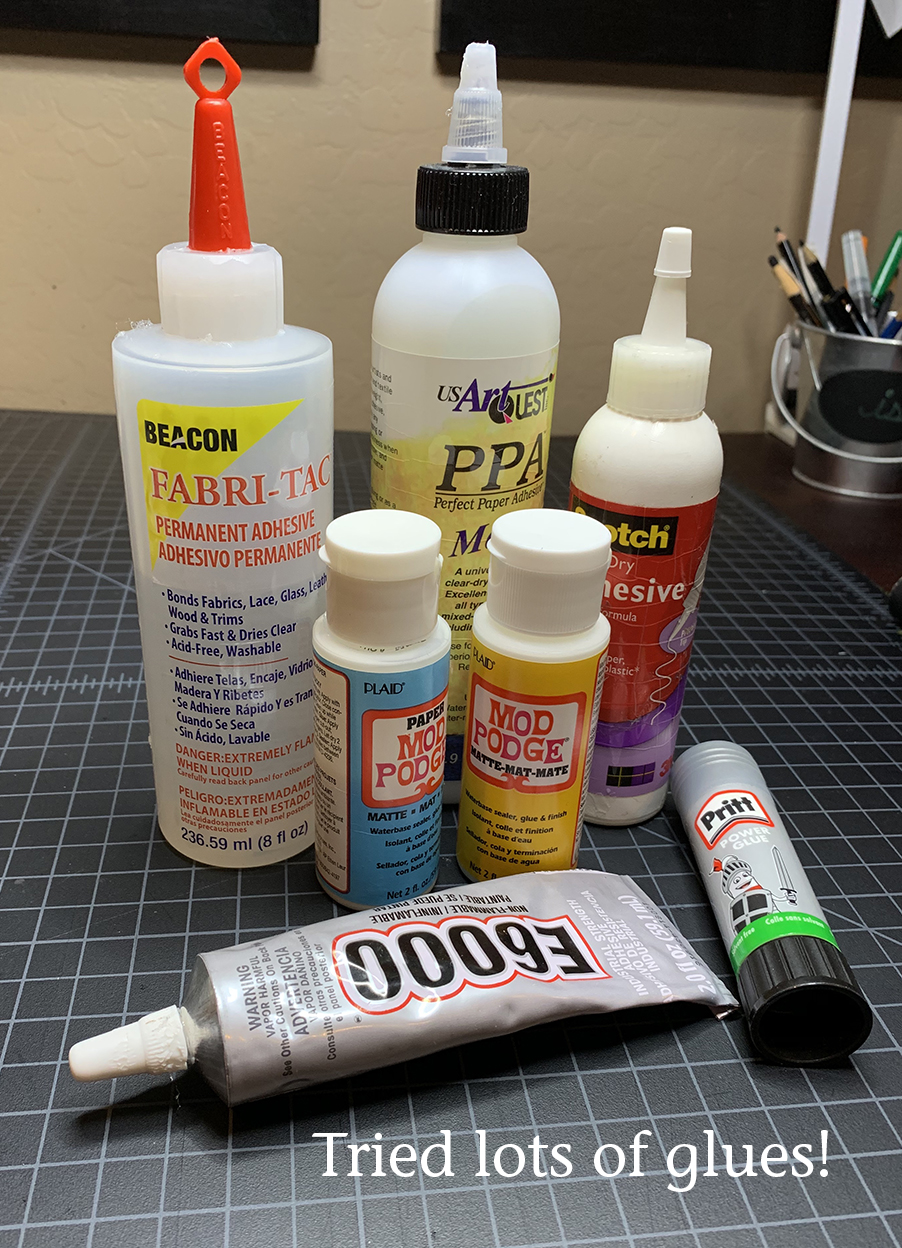
Over the years, I’ve tried dozens of glues for paper sculpture – the picture at right is only a fraction of the glues.
NOTE: the glue stick shown, the Pritt Power glue stick, is actually a pretty good glue stick. However, it dries out in less than 6 months for me, and I only use it rarely.
In my earlier, personal paper sculpture experiments, I never found the perfect glue, which for me, was one that would:
-
dry quickly to hold a position, but slow enough to allow for some repositioning,
-
would dry unseen, particularly against dark paper, for areas where there the glue had inevitably spread
-
would be acid-free and archival,
-
and would allow for some disassembly/future correction.
Some people worry about if the glue will wrinkle the paper: for me, if I was gluing a large enough area that I was worried about wrinkling, I would probably use spray glue in any case.
FABRI-TAC GLUE:
One of the most pressing questions I had in my meeting with Reinhard was what glue he used. I was quite surprised by the answer: Fabri-tac by Beacon, which is marketed more as a fabric glue in the US. Reinhard said when he came to America in the 1960’s he could not find the same glue he had used in Germany. When he contacted the manufacturer, they said this Fabri-tac glue was the same glue (obviously it’s been around for a long time then.)
He said that at least one of my original requirements, that the glue would dry unseen, was unrealistic. But the particular advantage of the Fabri-tac glue was its ability to be cleaned up. If you can clean up glue errors, you don’t have to worry about it drying “invisible”.
Of course, since most of these pieces will be photographed for reproduction, glue spots could also be eliminated in Photoshop. My goal, however, is to work as clean as possible, and have the final pieces as clean as possible in real life.
In the next post, I’ll discuss where to glue and how to assemble, but today I just want to discuss how to use this particular glue.
Fabri-Tac is very readily available, and sometimes the 8 oz bottle is considerably cheaper than the smaller 4 oz bottles. The opening of the 4 oz bottles, however, is a nice in-between size to use as an applicator on slightly larger pieces or background structure pieces.
ACETONE
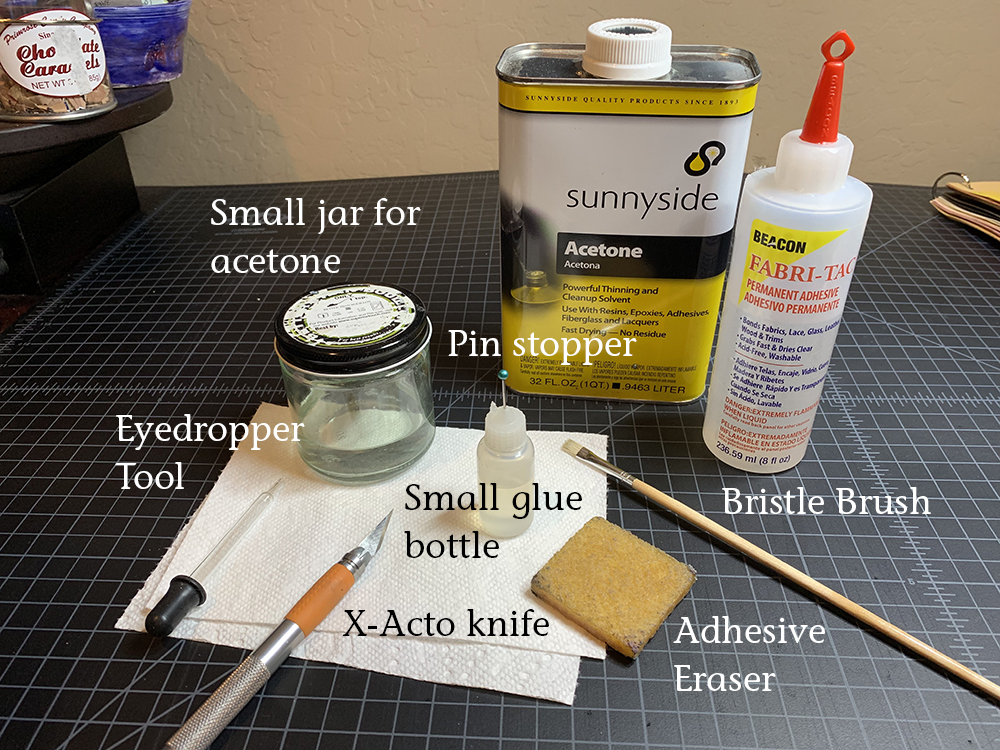
Almost as important as the Fabri-Tac glue is having a bottle of acetone.
The acetone allows you to thin the glue (it's acetone-based), and also to clean up glue spots. This bottle is a fancy one from an art store that I bought just because it was convenient. It’s considerably cheaper to just buy it at Walmart or Home Depot/Lowes (around $8 a quart vs $20). I always keep some in a small glass jar for convenience of use. You used to be able to purchase acetone on Amazon, but I’ve had a hard time finding it recently – it may be that they’ve changed the rules on shipping it.
I was worried when Reinhard suggested acetone as a diluter/cleaner, as I am striving for archival wherever possible in my work. I found out, however, that acetone is as neutral as water – it’s perfectly safe to use. It is also safe on your hands – acetone is basically nail polish remover. You can buy nail polish remover, except it almost always has some color added and I don’t want to risk the color staining the paper sculpture. If my hands get sticky from the spray glue, I will put some acetone on a paper towel, and rub the glue off my hands. (I do find they get dry so I use hand cream after).
Be careful with the acetone – it will strip many things (ie., spill it on your cutting mat, and it will take off the lines. It will also take off the finish on your drawing table.)
Working with the Glue and Acetone:
First transfer the Fabri-tac to a glue bottle with a smaller opening (see photo).
By tightly controlling the amount of glue put on the paper, it is easier to control the amount of glue that spreads. These bottles on Amazon are perfect: it’s often cheaper to buy two at a time. I just pull off the attached stopper/lid, and replace it with a straight pin. I prefer the straight-pins with a little ball on top because they are easier to grab.
If the glue needs to be diluted (you can tell because it is either too hard to squeeze out of the bottle, or is too stringy), you can add several eyedroppers of acetone to the small bottle. Then shake the bottle to incorporate the acetone in the glue. Be careful not to dilute too much, or the glue will lose its adhesive strength.
I also find that the glue progressively builds up inside the metal tube and on the straight pin. I regularly scrape the glue down with my fingernails off the straight pin (yet another reason I’ll never be a hand model). And I’ve started a routine where when I know I will be gluing that day, I will soak the metal tube for several minutes in the small acetone jar and then clean it out with the pin. This may not be necessary depending on the climate where you live.
NOTE: I have never (as an adult) cut my fingers with my x-acto knife (knock wood). I POKE myself with the pin almost every day when I’m cleaning it out.
Working with the Glue and Acetone:
I imagine there are some people out there who are so neat, they never have glue overages. I am not that person. Even with a small applicator, there are always spots where glue is visible.
My first method of cleaning the glue is to scrape very slightly the edge with an x-acto knife. Within minutes, the glue becomes rubbery, and you can usually “roll away” much of the excess, leaving a clean line.
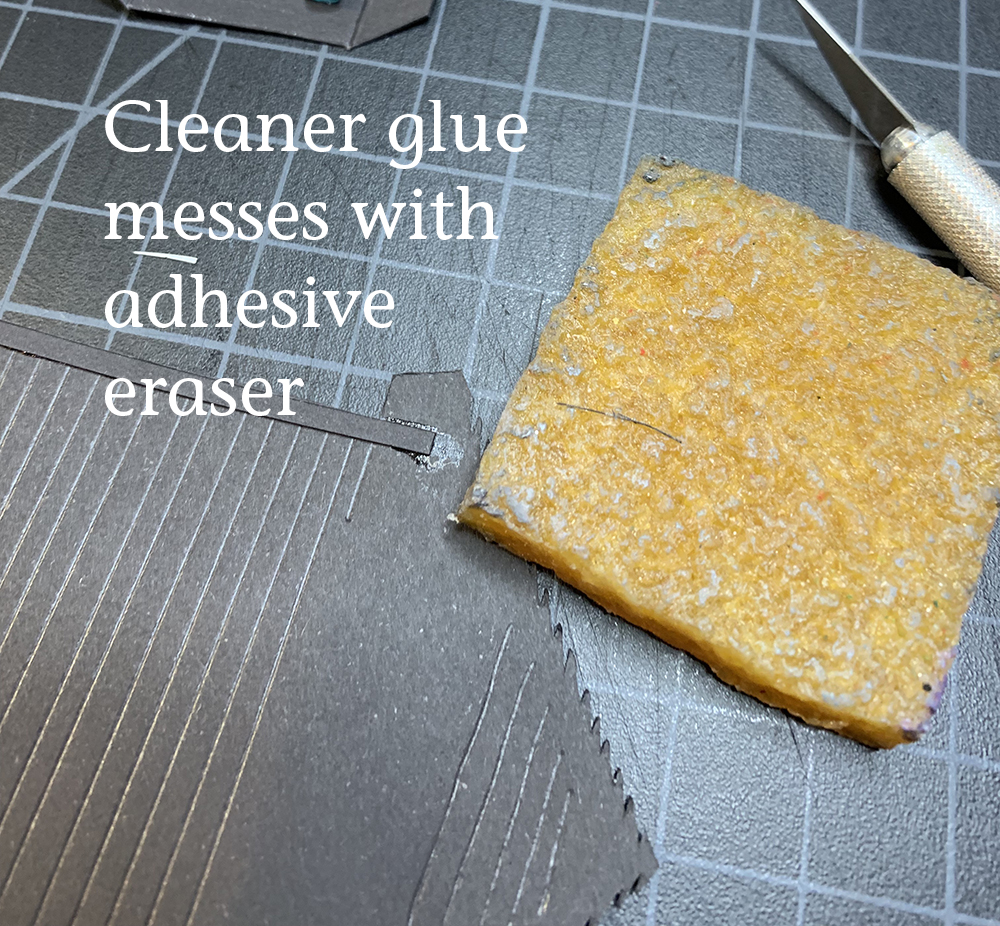
The second method to clean an edge is to use an adhesive eraser. I have to admit, I never knew what this type of eraser was for – I just thought it was a terrible eraser for removing graphite. But if you drag it along a glue overage (if not too dry), the glue rolls up and off the paper. If the adhesive eraser gets too yucky, just cut the edges off.
The last method for cleaning, which is the only one that can be used if the glue is completely dry, is to paint acetone along the glue spill. I find that a bristle brush works best because sometimes you need to scrub the area a little. You need to be a little careful not to use too much or you will break the adhesion of the two pieces. Conversely, using acetone along the join is a method of removing pieces previously glued. Reinhard said one time he had a piece he had to take apart completely, so he soaked it in a bath of acetone and all the separate pieces just floated apart. (Terrifying!!)
NOTE: If you’ve already used pastel to colorize an area, all of these methods of removing the glue will also remove the pastel. You can sometimes smudge the pastel back over, or you may have to reapply.